# 编译 Linux 内核 && 添加系统调用
在这篇文章中做一个小实验,先对 Linux 内核的源码做一些小改动,我们就只是在其中添加一个系统调用就好了,然后我们对内核进行编译并使用它
目标:
- 添加系统调用
- 编译 && 安装
- 测试我们的系统调用
# 1 添加系统调用
实验环境
我这次是直接在安装了 Ubuntu 系统的虚拟机中进行实验的,当前系统的内核版本是 ubuntu 6.8.0
blueberry@ubuntu:~/expr/linux-6.8.9$ uname -a
Linux ubuntu 6.8.0-31-generic #31-Ubuntu SMP PREEMPT_DYNAMIC Sat Apr 20 00:40:06 UTC 2024 x86_64 x86_64 x86_64 GNU/Linux
2
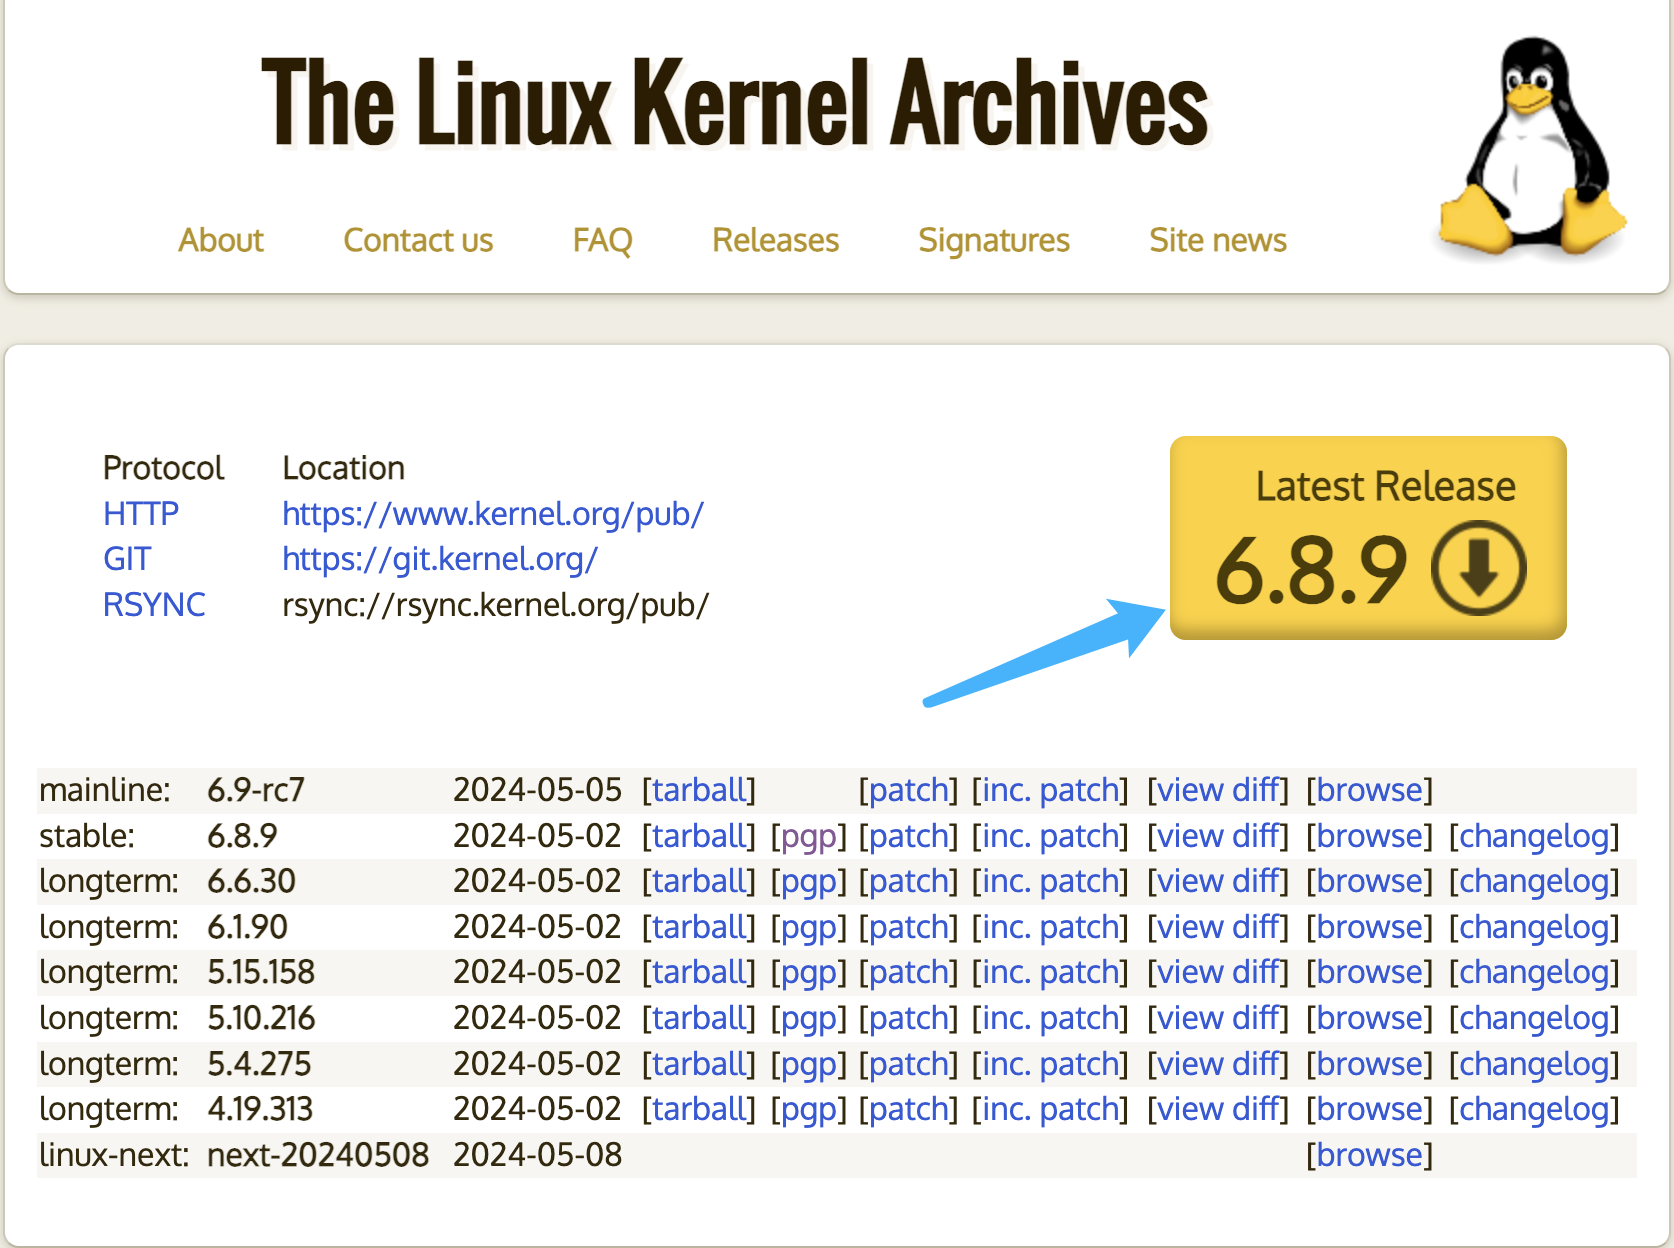
下载源码
我们得先下载一个 Linux 的内核源码
传送门:https://kernel.org/
我们直接来到这里进行下载就可以了,你可以下载一个你感兴趣的版本,而我就直接下载 6.8.9 这个版本了
为了简单,我就不对下载后的内核源码进行正确性的验证了,通常来说是没有问题的,在文章的最后我给出了我参考的资料,这些资料里面会有更详细的内容
好啦,我已经把源码下载到了这个路径
blueberry@ubuntu:~/expr$ pwd
/home/blueberry/expr
blueberry@ubuntu:~/expr$ ls
linux-6.8.9.tar.xz
2
3
4
解压
对源码文件进行解压,解压后 linux-6.8.9 就是我们要的源码啦
blueberry@ubuntu:~/expr$ tar -xf linux-6.8.9.tar.xz
blueberry@ubuntu:~/expr$ ls
linux-6.8.9  linux-6.8.9.tar.xz
2
3
修改源码
你只需要按照我接下来的操作进行就可以了,先不用特别在意为什么要这么做
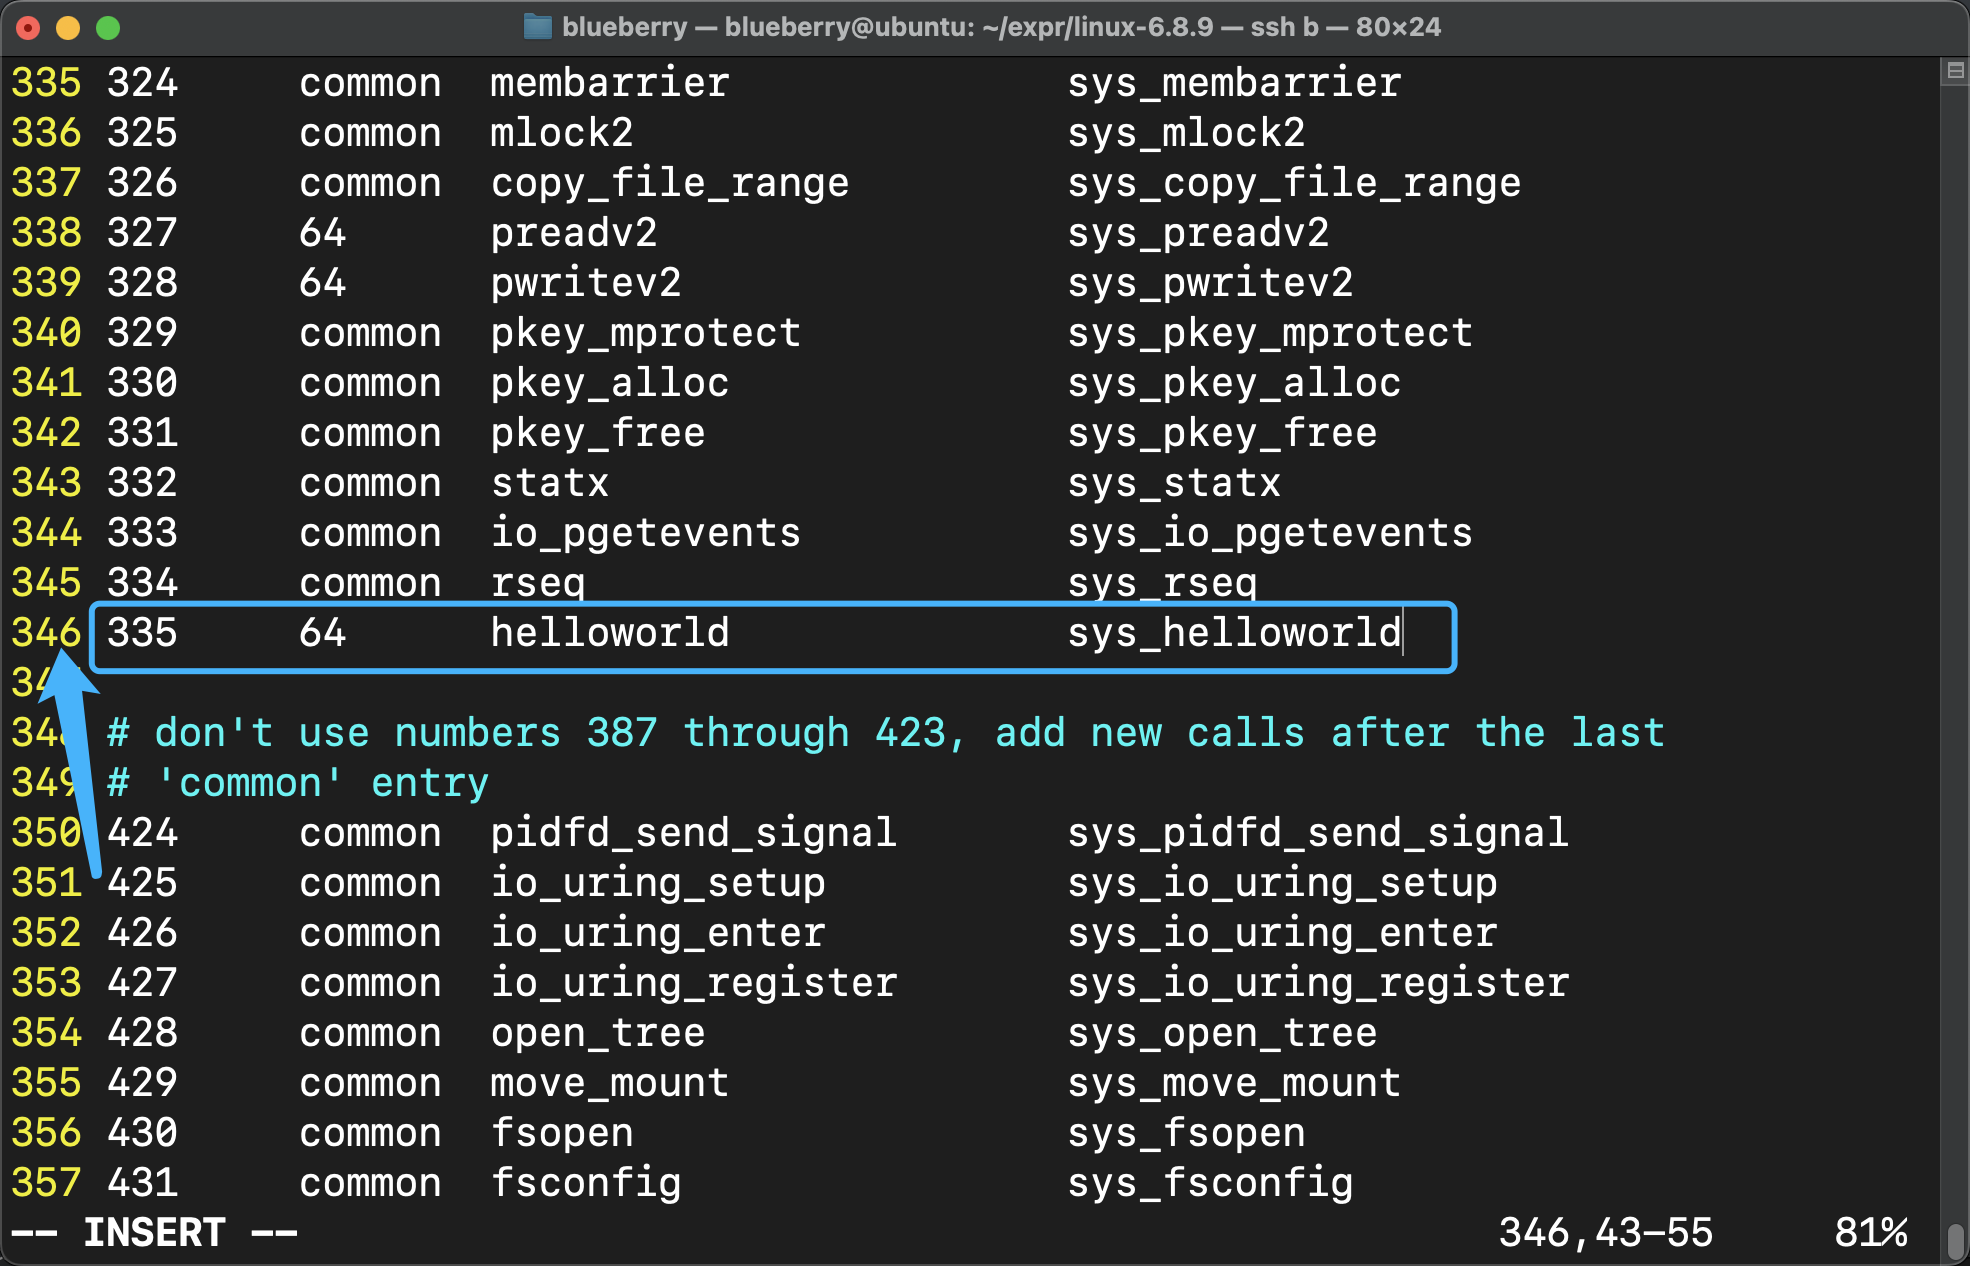
1. 修改 syscall_64.tbl
blueberry@ubuntu:~/expr/linux-6.8.9/arch/x86/entry/syscalls$ pwd
/home/blueberry/expr/linux-6.8.9/arch/x86/entry/syscalls
blueberry@ubuntu:~/expr/linux-6.8.9/arch/x86/entry/syscalls$ ls -ltr
total 40
-rw-rw-r-- 1 blueberry blueberry 15278 May  2 14:35 syscall_64.tbl
-rw-rw-r-- 1 blueberry blueberry 18346 May  2 14:35 syscall_32.tbl
-rw-rw-r-- 1 blueberry blueberry  2527 May  2 14:35 Makefile
blueberry@ubuntu:~/expr/linux-6.8.9/arch/x86/entry/syscalls$ vim syscall_64.tbl
2
3
4
5
6
7
8
来到这个文件的 346 行,在这里添加一行;这里的 335 是系统调用号,你可以根据你下载的内核版本,自己选择一个合适的系统调用号填上去就可以了,只要不和别的重复即可
335 64 helloworld sys_helloworld
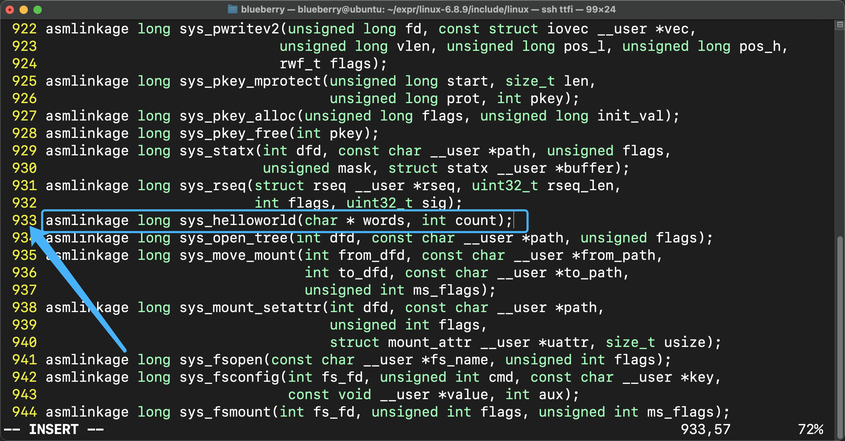
2. 修改 syscalls.h
blueberry@ubuntu:~/expr/linux-6.8.9/include/linux$ pwd
/home/blueberry/expr/linux-6.8.9/include/linux
blueberry@ubuntu:~/expr/linux-6.8.9/include/linux$ vim syscalls.h
2
3
我们在 933 行添加一行如下的代码:
asmlinkage long sys_helloworld(char * words, int count);
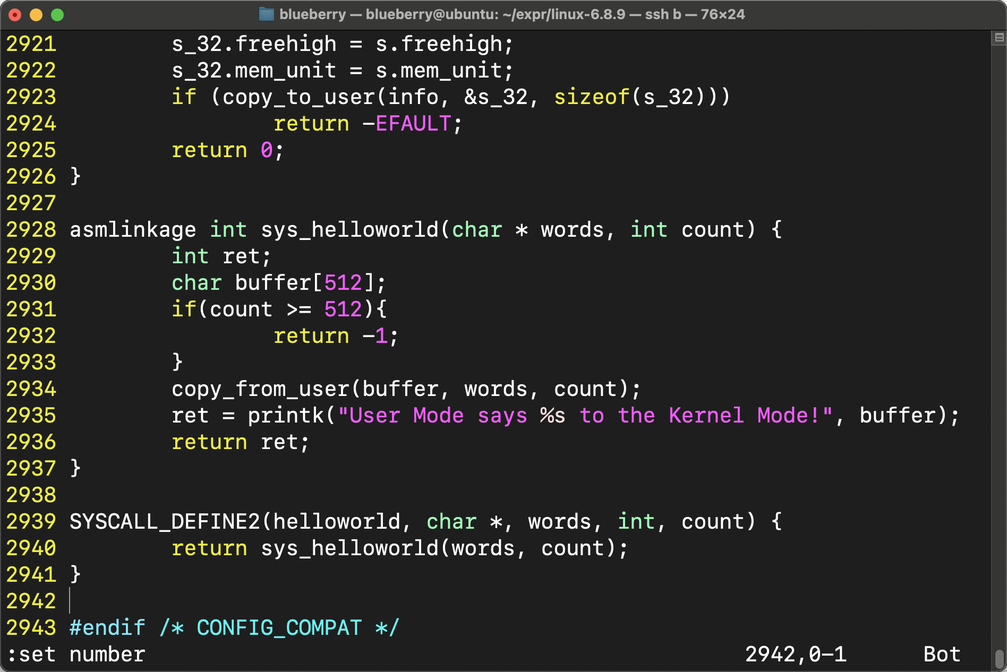
3. 修改 sys.c
blueberry@ubuntu:~/expr/linux-6.8.9/kernel$ pwd
/home/blueberry/expr/linux-6.8.9/kernel
blueberry@ubuntu:~/expr/linux-6.8.9/kernel$ vim sys.c
2
3
我们直接来到这个文件的末尾,添加如下代码:
asmlinkage int sys_helloworld(char * words, int count) {
        int ret;
        char buffer[512];
        if(count >= 512){
                return -1;
        }
        copy_from_user(buffer, words, count);
        ret = printk("User Mode says %s to the Kernel Mode!", buffer);
        return ret;
}

SYSCALL_DEFINE2(helloworld, char *, words, int, count) {
        return sys_helloworld(words, count);
}
2
3
4
5
6
7
8
9
10
11
12
13
14
# 2 编译 && 安装
接下来我们就来编译内核并将它进行安装
安装所必要的工具
blueberry@ubuntu:~/expr/linux-6.8.9$ sudo apt install bc binutils bison dwarves flex gcc git gnupg2 gzip libelf-dev libncurses5-dev libssl-dev make openssl pahole perl-base rsync tar xz-utils
生成配置文件 .config
Linux 内核的编译是受到这么一个文件进行控制的,比如哪些模块要被编译,哪些干脆不要了,这些内容都是在这样一个配置文件中的
既然我们编译好的内核最终是要安装到虚拟机这台机器本身的,那么最好的方式当然是参考虚拟机本身的内核所使用的配置文件啦,在我的机器上,这个默认的配置文件在这个位置:
blueberry@ubuntu:/boot$ pwd
/boot
blueberry@ubuntu:/boot$ ls -ltr
total 89272
-rw------- 1 root root  9047800 Apr 19 21:46 System.map-6.8.0-31-generic
-rw-r--r-- 1 root root   287473 Apr 19 21:46 config-6.8.0-31-generic
-rw------- 1 root root 14928264 Apr 19 21:48 vmlinuz-6.8.0-31-generic
drwx------ 2 root root    16384 May  8 11:40 lost+found
lrwxrwxrwx 1 root root       24 May  8 11:44 vmlinuz.old -> vmlinuz-6.8.0-31-generic
lrwxrwxrwx 1 root root       24 May  8 11:44 vmlinuz -> vmlinuz-6.8.0-31-generic
lrwxrwxrwx 1 root root       27 May  8 11:44 initrd.img.old -> initrd.img-6.8.0-31-generic
lrwxrwxrwx 1 root root       27 May  8 11:44 initrd.img -> initrd.img-6.8.0-31-generic
-rw-r--r-- 1 root root 67121483 May  8 11:45 initrd.img-6.8.0-31-generic
drwxr-xr-x 5 root root     4096 May  8 11:45 grub
2
3
4
5
6
7
8
9
10
11
12
13
14
在 /boot 目录中的 config-6.8.0-31-generic 文件就是这台虚拟机的 Linux 内核在编译的时候所使用的配置文件,那么我们直接把这个文件拷贝到我们的源码目录中并且把它命名为 .config,就像这样:
blueberry@ubuntu:~/expr/linux-6.8.9$ pwd
/home/blueberry/expr/linux-6.8.9
blueberry@ubuntu:~/expr/linux-6.8.9$ cp /boot/config-6.8.0-31-generic .config
2
3
既然我们所使用的内核相较于我本机的内核ubuntu 6.8.0 是更新的,所以很有可能会有一些新的配置项,那么我们可以通过 make olddeconfig 来将 .config 和那些有可能必须要添加上的新配置项进行一个合并,最终写入 .config 文件中,我们像这样执行就好:
blueberry@ubuntu:~/expr/linux-6.8.9$ pwd
/home/blueberry/expr/linux-6.8.9
blueberry@ubuntu:~/expr/linux-6.8.9$ make olddefconfig
  HOSTCC  scripts/kconfig/conf.o
  HOSTCC  scripts/kconfig/confdata.o
  HOSTCC  scripts/kconfig/expr.o
  LEX     scripts/kconfig/lexer.lex.c
  YACC    scripts/kconfig/parser.tab.[ch]
  HOSTCC  scripts/kconfig/lexer.lex.o
  HOSTCC  scripts/kconfig/menu.o
  HOSTCC  scripts/kconfig/parser.tab.o
  HOSTCC  scripts/kconfig/preprocess.o
  HOSTCC  scripts/kconfig/symbol.o
  HOSTCC  scripts/kconfig/util.o
  HOSTLD  scripts/kconfig/conf
.config:10817:warning: symbol value 'm' invalid for ANDROID_BINDER_IPC
.config:10818:warning: symbol value 'm' invalid for ANDROID_BINDERFS
#
# configuration written to .config
#
2
3
4
5
6
7
8
9
10
11
12
13
14
15
16
17
18
19
20
编译
接下来,我们就可以编译了,我们直接这样:
这里的 nproc 来查看当前的 CPU 有几个核心,然后 sudo make -j8 代表使用 8 个核心来进行编译,你可以使用 tee log 把编译过程中的输出内容记录在 log 文件中,时候你直接去里面搜索 Error 即可
blueberry@ubuntu:~/expr/linux-6.8.9$ pwd
/home/blueberry/expr/linux-6.8.9
blueberry@ubuntu:~/expr/linux-6.8.9$ nproc
8
blueberry@ubuntu:~/expr/linux-6.8.9$ sudo make -j8 | tee log
2
3
4
5
接下来就是漫长的编译过程了,让我们等待它完成编译 ~
第一次出错
好!不出意外的,我这里已经报错了,我们在 log 文件里面搜索一下 Error 关键字可以发现有三处都有 Error,其中一处是这样的:
make[3]: *** No rule to make target 'debian/canonical-certs.pem', needed by 'certs/x509_certificate_list'.  Stop.
make[2]: *** [scripts/Makefile.build:481: certs] Error 2
2
我们执行下面这条命令,关闭某条配置项来解决这个问题:
blueberry@ubuntu:~/expr/linux-6.8.9$ pwd
/home/blueberry/expr/linux-6.8.9
blueberry@ubuntu:~/expr/linux-6.8.9$ sudo scripts/config --disable SYSTEM_TRUSTED_KEYS
2
3
然后再次执行编译的命令:
blueberry@ubuntu:~/expr/linux-6.8.9$ sudo make -j8 | tee log
在编译的过程中可能会停顿下来,这时候按回车继续就可以了 ~
第二次出错
好!经过漫长的等待,又报错了!
make[3]: *** No rule to make target 'debian/canonical-revoked-certs.pem', needed by 'certs/x509_revocation_list'.  Stop.
make[3]: *** Waiting for unfinished jobs....
2
我们执行下面这条命令,关闭某条配置项来解决这个问题:
blueberry@ubuntu:~/expr/linux-6.8.9$ sudo scripts/config --disable SYSTEM_REVOCATION_KEYS
然后再次执行编译的命令:
blueberry@ubuntu:~/expr/linux-6.8.9$ sudo make -j8 | tee log
同样的,在编译的过程中可能会停顿下来,这时候按回车继续就可以了 ~
安装 modules
终于编译完成啦!
接下来我们先来安装模块,直接执行这条命令:
blueberry@ubuntu:~/expr/linux-6.8.9$ pwd
/home/blueberry/expr/linux-6.8.9
blueberry@ubuntu:~/expr/linux-6.8.9$ sudo make modules_install -j8
2
3
这个过程在我这里还算顺利,顺利完成!
安装系统
直接执行这条命令:
blueberry@ubuntu:~/expr/linux-6.8.9$ pwd
/home/blueberry/expr/linux-6.8.9
blueberry@ubuntu:~/expr/linux-6.8.9$ sudo make install
  INSTALL /boot
run-parts: executing /etc/kernel/postinst.d/initramfs-tools 6.8.9 /boot/vmlinuz-6.8.9
update-initramfs: Generating /boot/initrd.img-6.8.9
run-parts: executing /etc/kernel/postinst.d/unattended-upgrades 6.8.9 /boot/vmlinuz-6.8.9
run-parts: executing /etc/kernel/postinst.d/update-notifier 6.8.9 /boot/vmlinuz-6.8.9
run-parts: executing /etc/kernel/postinst.d/xx-update-initrd-links 6.8.9 /boot/vmlinuz-6.8.9
I: /boot/initrd.img is now a symlink to initrd.img-6.8.9
run-parts: executing /etc/kernel/postinst.d/zz-update-grub 6.8.9 /boot/vmlinuz-6.8.9
Sourcing file `/etc/default/grub'
Generating grub configuration file ...
Found linux image: /boot/vmlinuz-6.8.9
Found initrd image: /boot/initrd.img-6.8.9
Found linux image: /boot/vmlinuz-6.8.0-31-generic
Found initrd image: /boot/initrd.img-6.8.0-31-generic
Warning: os-prober will not be executed to detect other bootable partitions.
Systems on them will not be added to the GRUB boot configuration.
Check GRUB_DISABLE_OS_PROBER documentation entry.
Adding boot menu entry for UEFI Firmware Settings ...
done
2
3
4
5
6
7
8
9
10
11
12
13
14
15
16
17
18
19
20
21
22
好啦,到这里,我们不仅添加了一条系统调用,而且完成了源码的编译和安装,接下来我们只要重启虚拟机,进入 GRUB 的高级选项中,选择我们新的内核启动就可以啦!
使用新的内核
接下来只需要重新启动虚拟机,然后在虚拟机打开后会来到这个界面,我们就选择图中框出来的那个选项:

这时候,我们就看到了刚才编译好的那个版本的内核,我们选中它按回车:

好啦,现在我已经重启完成,那么让我们进入到系统中查看一下当前的系统内核版本叭
blueberry@ubuntu:~$ uname -a
Linux ubuntu 6.8.9 #5 SMP PREEMPT_DYNAMIC Thu May  9 02:24:38 UTC 2024 x86_64 x86_64 x86_64 GNU/Linux
2
真是太棒了!内核版本已经更新为 6.8.9,如果你坚持到了这里快给自己鼓个掌!
# 3 测试我们的系统调用
既然,我们已经添加了系统调用,总是要试用一下我们自己添加的系统调用能不能用呢,我们在新内核的系统中写一个简单的 C 程序来测试一下叭 ~
我们把代码放在 hello.c 文件中:
blueberry@ubuntu:~/expr$ pwd
/home/blueberry/expr
blueberry@ubuntu:~/expr$ ls
linux-6.8.9  linux-6.8.9.tar.xz
blueberry@ubuntu:~/expr$ vim hello.c
2
3
4
5
代码如下:
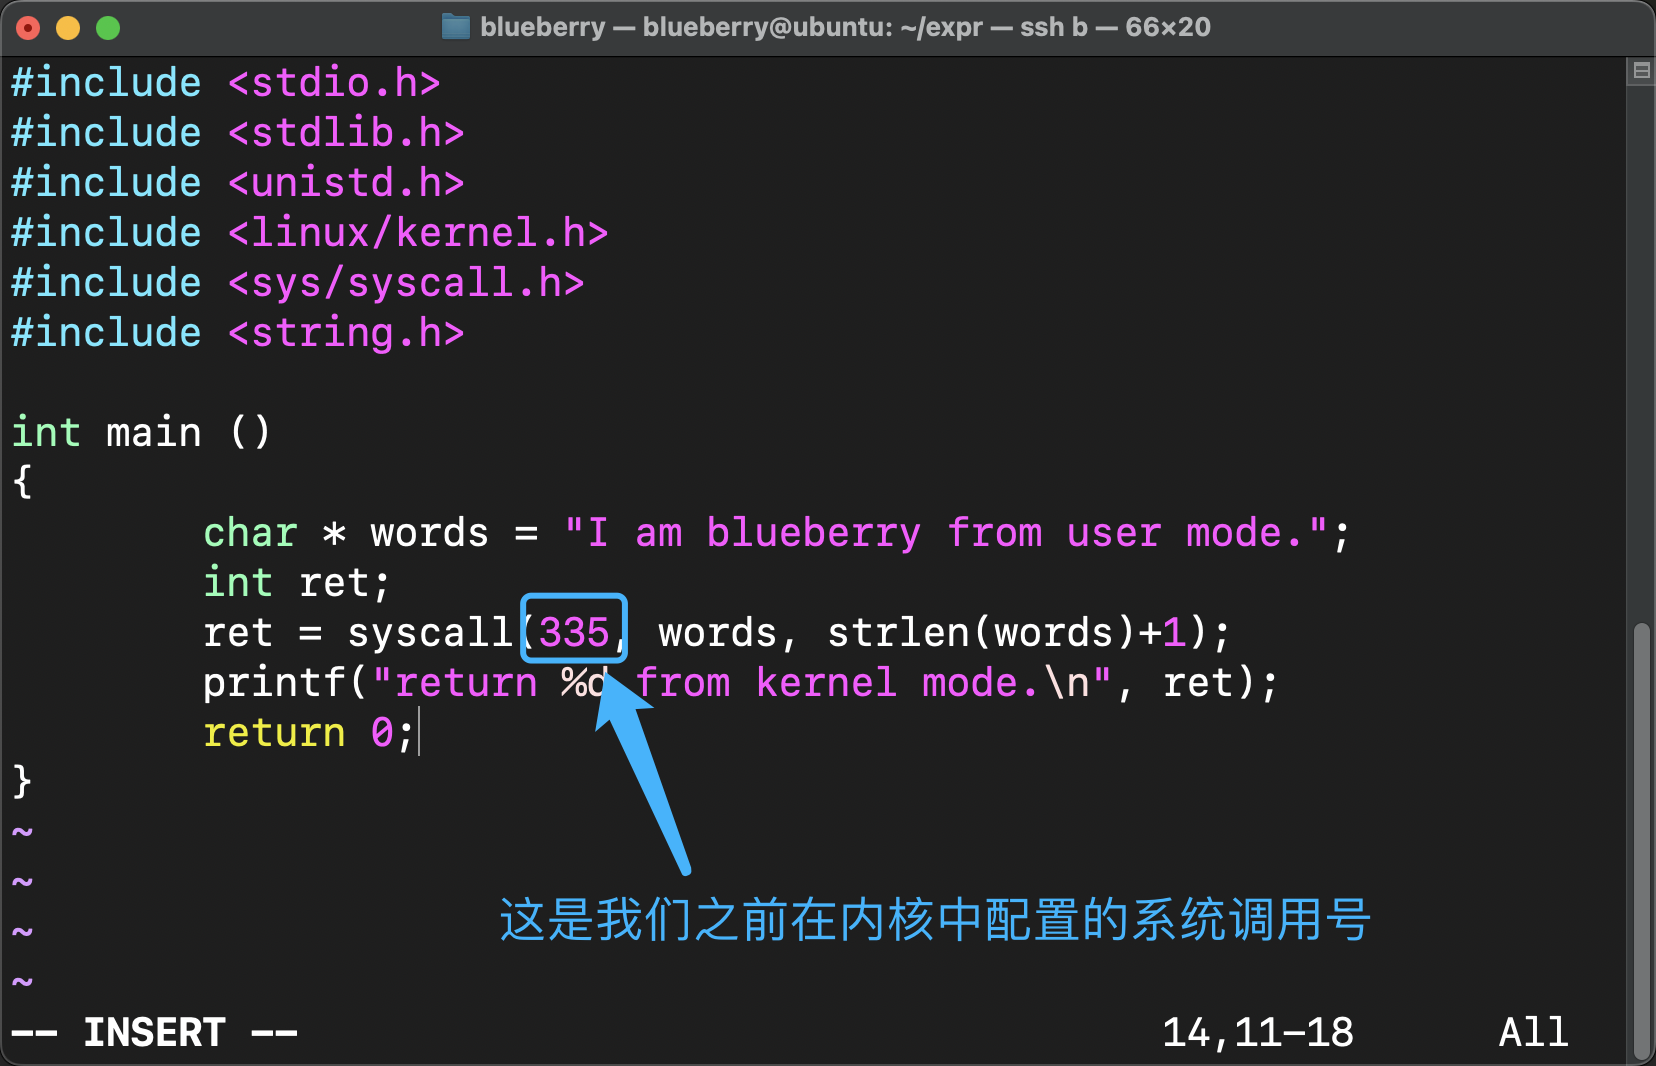
#include <stdio.h>
#include <stdlib.h>
#include <unistd.h>
#include <linux/kernel.h>
#include <sys/syscall.h>
#include <string.h>

int main ()
{
        char * words = "I am blueberry from user mode.";
        int ret;
        ret = syscall(335, words, strlen(words)+1);
        printf("return %d from kernel mode.\n", ret);
        return 0;
}
2
3
4
5
6
7
8
9
10
11
12
13
14
15
保存这个文件后,我们编译并执行它:
blueberry@ubuntu:~/expr$ ls
hello.c  linux-6.8.9  linux-6.8.9.tar.xz
blueberry@ubuntu:~/expr$ gcc hello.c -o hello.o
blueberry@ubuntu:~/expr$ ls
hello.c  hello.o  linux-6.8.9  linux-6.8.9.tar.xz
blueberry@ubuntu:~/expr$ ./hello.o
return 65 from kernel mode.
2
3
4
5
6
7
现在说明我们已经执行成功啦!
接着我们来看看系统日志中是不是出现了 I am blueberry from user mode 这段话呢
blueberry@ubuntu:~/expr$ cat /var/log/syslog | grep "I am blueberry from user mode"
2024-05-09T03:15:31.039730+00:00 ubuntu kernel: User Mode says I am blueberry from user mode. to the Kernel Mode!
2
太酷了!
恭喜你!
到这里为止,整个实验过程就完成啦!
真不容易!
「参考」
添加系统调用过程中遇到的坑,解决方案:
https://blog.csdn.net/HTLYing/article/details/131345735
内核编译过程的参考:
https://mp.weixin.qq.com/s/nXVsCJiN8lvgPEo-D5Zgig
编译过程中报错的解决方案:
https://askubuntu.com/questions/1329538/compiling-kernel-5-11-11-and-later
https://blog.csdn.net/m0_47696151/article/details/121574718