
调试 PostgreSQL
哈喽,大家好,学习一样东西很重要的一件事情就是调试它,在调试的过程中能够看到很多运行时的信息。那么,学习数据库也是一样的,这篇文章来看看如何在 CLion 中调试 PostgreSQL。
先交代一下我的开发环境,我是在 ubuntu 的虚拟机上下载了源码,并进行编译的,然后使用 clion 的远程开发功能连接上了这台虚拟机并打开了指定目录下的代码。
CLion 版本:2026.1.4
PostgreSQl 版本:18.4
gdb 版本:15.1
ubuntu 版本:24.04
1 下载源码
我在家目录中创建了 lib 目录,在这里把源码下载下来。
ubuntu@ubuntu:~/lib$ pwd
/home/ubuntu/lib

ubuntu@ubuntu:~/lib$ git clone https://git.postgresql.org/git/postgresql.git
Cloning into 'postgresql'...
remote: Enumerating objects: 1135823, done.
remote: Counting objects: 100% (43658/43658), done.
remote: Compressing objects: 100% (19099/19099), done.
remote: Total 1135823 (delta 35056), reused 30279 (delta 24360), pack-reused 1092165 (from 1)
Receiving objects: 100% (1135823/1135823), 382.82 MiB | 15.74 MiB/s, done.
Resolving deltas: 100% (983020/983020), done.

ubuntu@ubuntu:~/lib$ ls -ltr
total 4
drwxrwxr-x 8 ubuntu ubuntu 4096 Jul 26 03:23 postgresql
2 编译源码
创建 make-build-debug 目录
进入到 postgresql 的源码目录,然后创建 make-build-debug 目录,随后进入这个目录中。
# 1. 进入源码目录
ubuntu@ubuntu:~/lib$ cd postgresql/

# 2. 切换到稳定版的分支代码
ubuntu@ubuntu:~/lib/postgresql$ git fetch
ubuntu@ubuntu:~/lib/postgresql$ git switch REL_18_STABLE
Updating files: 100% (4264/4264), done.
branch 'REL_18_STABLE' set up to track 'origin/REL_18_STABLE'.
Switched to a new branch 'REL_18_STABLE'

# 3. 创建构建目录
ubuntu@ubuntu:~/lib/postgresql$ mkdir make-build-debug

ubuntu@ubuntu:~/lib/postgresql$ ls -ltr
total 868
-rw-rw-r--  1 ubuntu ubuntu    989 Jul 26 03:23 README.md
-rw-rw-r--  1 ubuntu ubuntu   1680 Jul 26 03:23 Makefile
-rw-rw-r--  1 ubuntu ubuntu    277 Jul 26 03:23 HISTORY
-rw-rw-r--  1 ubuntu ubuntu   4176 Jul 26 03:23 GNUmakefile.in
-rw-rw-r--  1 ubuntu ubuntu   1198 Jul 26 03:23 COPYRIGHT
-rw-rw-r--  1 ubuntu ubuntu    365 Jul 26 03:23 aclocal.m4
drwxrwxr-x  2 ubuntu ubuntu   4096 Jul 26 03:23 config
-rwxrwxr-x  1 ubuntu ubuntu 598439 Jul 26 03:23 configure
-rw-rw-r--  1 ubuntu ubuntu  91640 Jul 26 03:23 configure.ac
drwxrwxr-x  3 ubuntu ubuntu   4096 Jul 26 03:23 doc
drwxrwxr-x 63 ubuntu ubuntu   4096 Jul 26 03:23 contrib
-rw-rw-r--  1 ubuntu ubuntu   6641 Jul 26 03:23 meson_options.txt
-rw-rw-r--  1 ubuntu ubuntu 131715 Jul 26 03:23 meson.build
drwxrwxr-x 16 ubuntu ubuntu   4096 Jul 26 03:23 src
drwxrwxr-x  2 ubuntu ubuntu   4096 Jul 26 04:37 make-build-debug

ubuntu@ubuntu:~/lib/postgresql$ cd make-build-debug/
生成 Makefile
ubuntu@ubuntu:~/lib/postgresql/make-build-debug$ ../configure \
  --prefix="$HOME/lib/pgsql18-make-dev" \
  --enable-debug \
  --enable-cassert \
  CFLAGS="-O0 -g3"
checking build system type... aarch64-unknown-linux-gnu
checking host system type... aarch64-unknown-linux-gnu
checking which template to use... linux
。。。。。。此处省略很多行。。。。。。。。。
config.status: linking ../src/backend/port/posix_sema.c to src/backend/port/pg_sema.c
config.status: linking ../src/backend/port/sysv_shmem.c to src/backend/port/pg_shmem.c
config.status: linking ../src/include/port/linux.h to src/include/pg_config_os.h
config.status: linking ../src/makefiles/Makefile.linux to src/Makefile.port

ubuntu@ubuntu:~/lib/postgresql/make-build-debug$ ls
config  config.log  config.status  contrib  doc  GNUmakefile  Makefile  src
编译 && 测试 && 安装
你在编译的时候可能会遇到缺少编译工具的错误,这时候就自己把那套编译工具按一下好啦,这里就不再展示了(我之前已经安装过了,所以这里都很顺利)。
# 1. 编译
ubuntu@ubuntu:~/lib/postgresql/make-build-debug$ make -j"$(nproc)"
make -C ./src/backend generated-headers
make[1]: Entering directory '/home/ubuntu/lib/postgresql/make-build-debug/src/backend'
make -C ../include/catalog generated-headers
make -C nodes generated-header-symlinks
。。。。。。此处省略很多行。。。。。。。。。
make -C test/perl all
make[2]: Entering directory '/home/ubuntu/lib/postgresql/make-build-debug/src/test/perl'
make[2]: Nothing to be done for 'all'.
make[2]: Leaving directory '/home/ubuntu/lib/postgresql/make-build-debug/src/test/perl'
make[1]: Leaving directory '/home/ubuntu/lib/postgresql/make-build-debug/src'

# 2. 回归测试
ubuntu@ubuntu:~/lib/postgresql/make-build-debug$ make check
make -C ./src/backend generated-headers
make[1]: Entering directory '/home/ubuntu/lib/postgresql/make-build-debug/src/backend'
make -C ../include/catalog generated-headers
。。。。。。此处省略很多行。。。。。。。。。
ok 243       - event_trigger_login                        23 ms
ok 244       - fast_default                              214 ms
ok 245       - tablespace                                391 ms
1..245
# All 245 tests passed.
make[1]: Leaving directory '/home/ubuntu/lib/postgresql/make-build-debug/src/test/regress'

# 3. 安装
ubuntu@ubuntu:~/lib/postgresql/make-build-debug$ make install
make -C ./src/backend generated-headers
make[1]: Entering directory '/home/ubuntu/lib/postgresql/make-build-debug/src/backend'
make -C ../include/catalog generated-headers
。。。。。。此处省略很多行。。。。。。。。。
/usr/bin/install -c -m 755 /home/ubuntu/lib/postgresql/make-build-debug/../config/install-sh '/home/ubuntu/lib/pgsql18-make-dev/lib/pgxs/config/install-sh'
/usr/bin/install -c -m 755 /home/ubuntu/lib/postgresql/make-build-debug/../config/missing '/home/ubuntu/lib/pgsql18-make-dev/lib/pgxs/config/missing'
make[1]: Leaving directory '/home/ubuntu/lib/postgresql/make-build-debug/config'

# 4. 看下安装后的版本
ubuntu@ubuntu:~/lib/postgresql/make-build-debug$ $HOME/lib/pgsql18-make-dev/bin/postgres --version
postgres (PostgreSQL) 18.4
3 CLion 配置
配置下 CLion
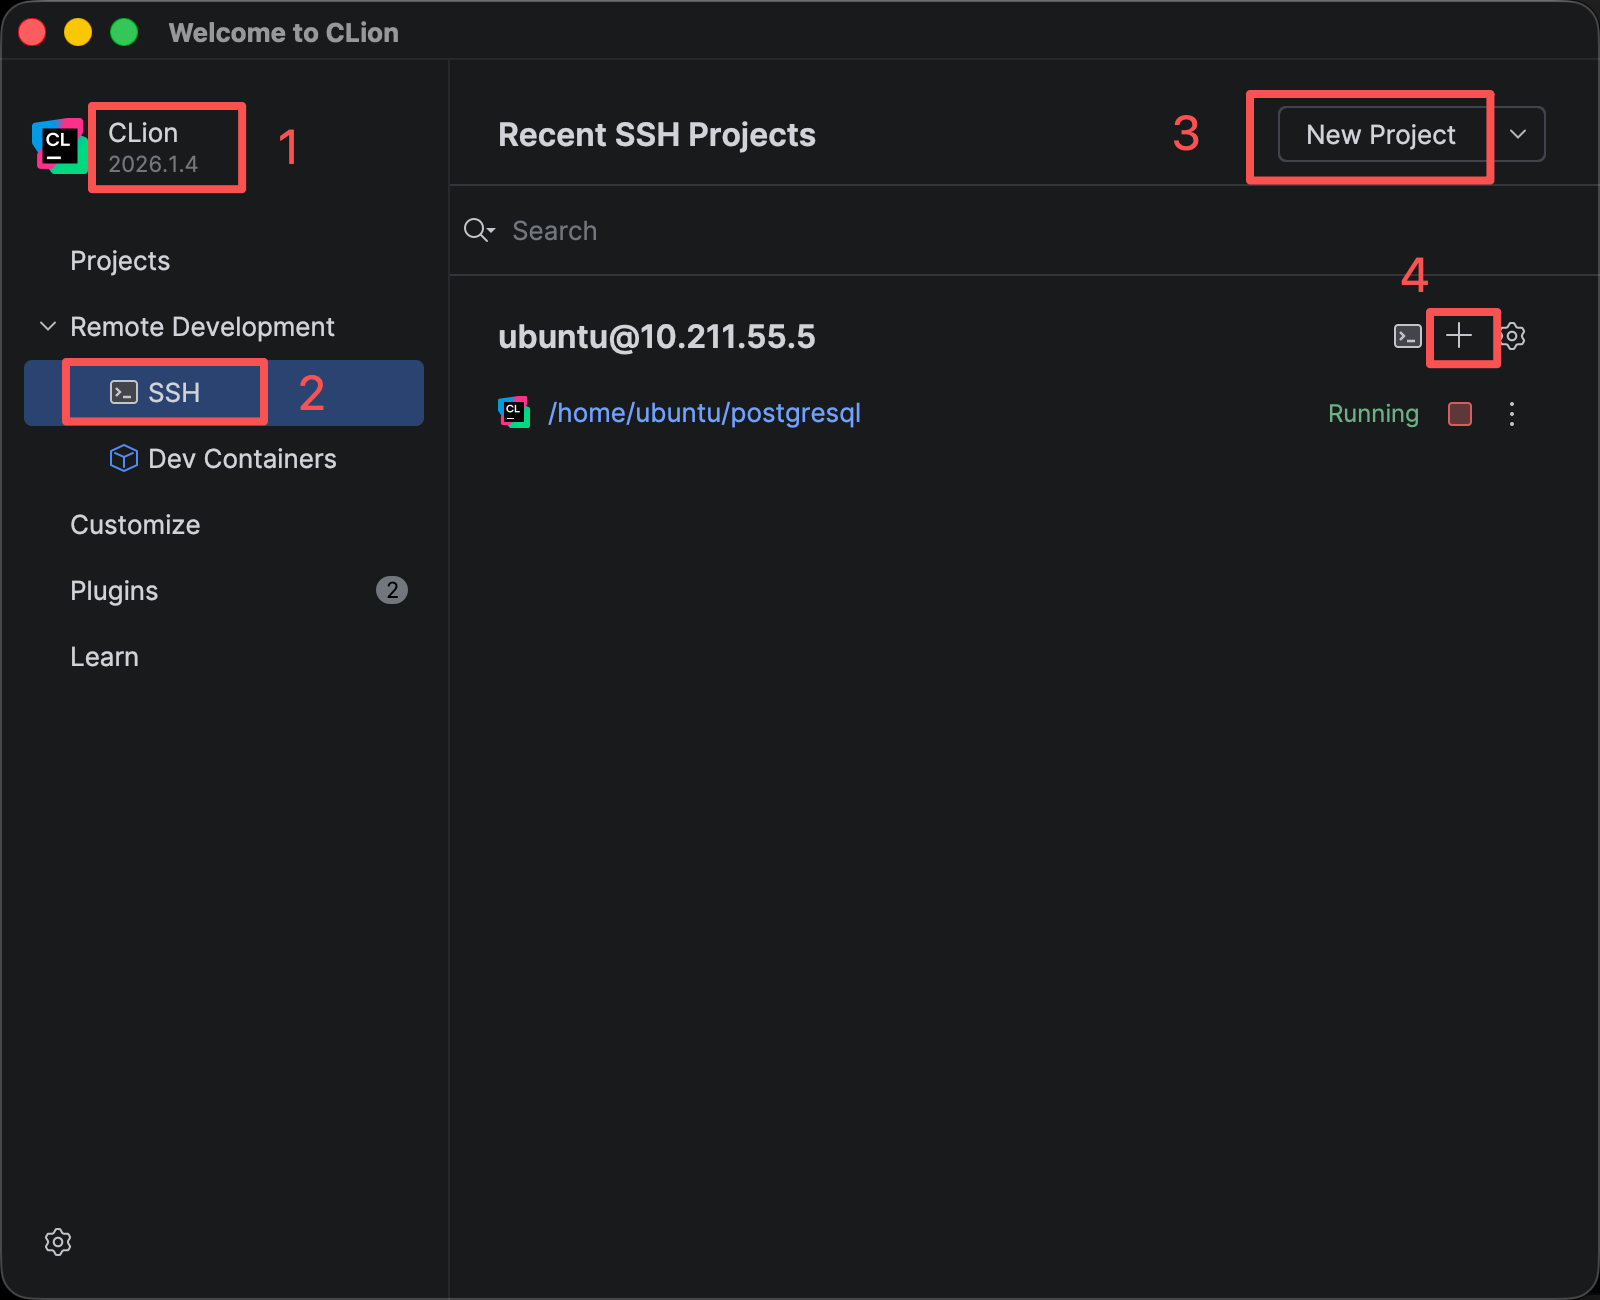
打开 CLion 后一共有四个步骤
- 看看你的版本号是不是和我差很多,可能版本号不同的情况下,功能也会有些不同。
- 选择 Remove Development 里面的 SSH
- 选择 New Project 这里其实就是创建 SSH 连接到你的虚拟机(自来就好啦)
- 创建 SSH 连接后,在下方就可以看到你的那台机器了,点击这里的 ""+" 可以打开一个属于这台机器上的远程项目。如果你是第一次使用这种方式,那么 CLion 需要在你的远程机器上安装一些东西,需要等待片刻。
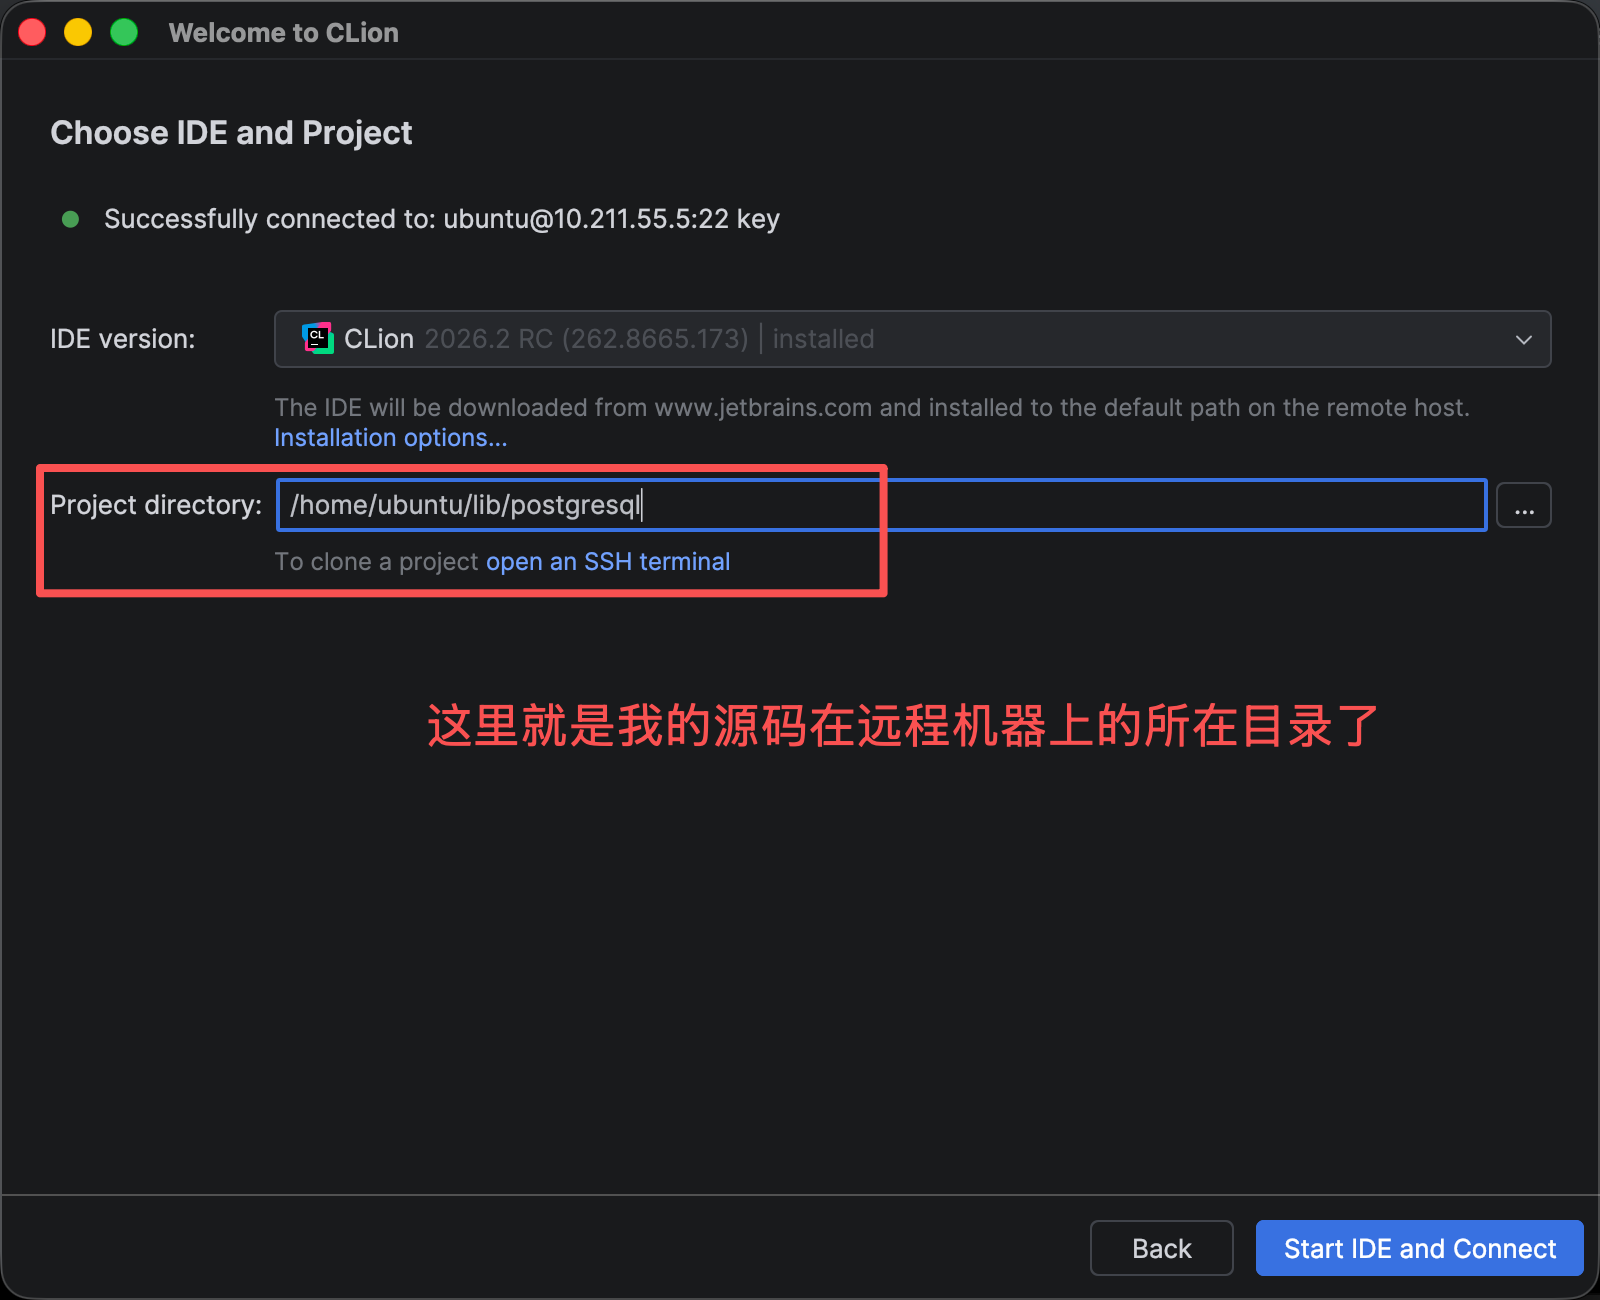
打开源码所在目录:然后点 Start IDE and connect
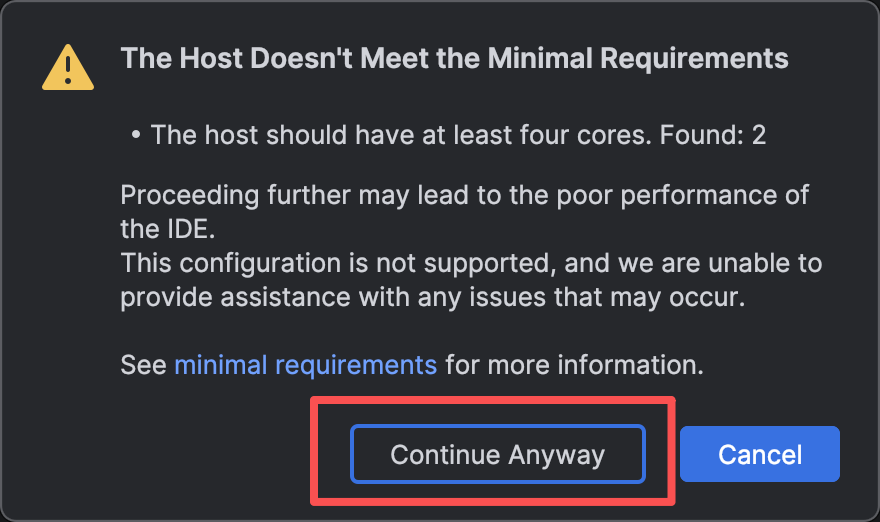
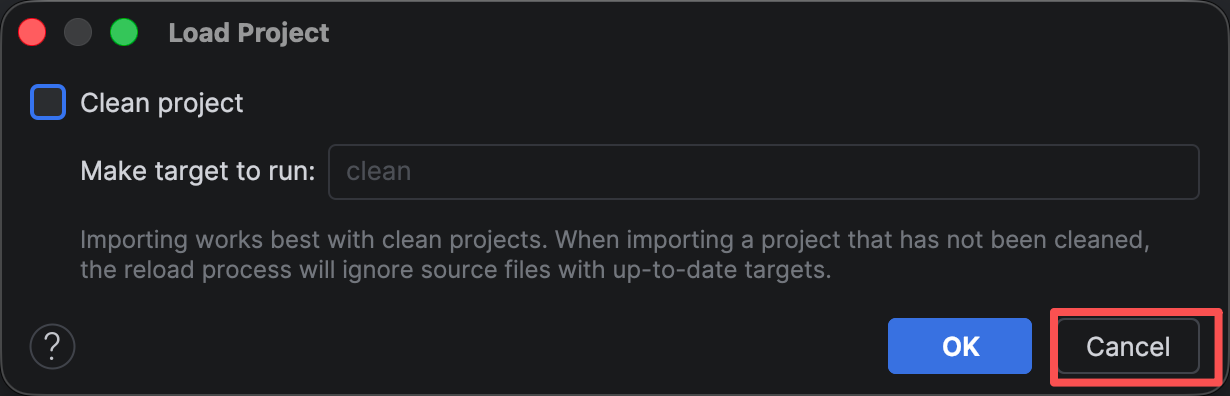
遇到这种提示的时候,点它!
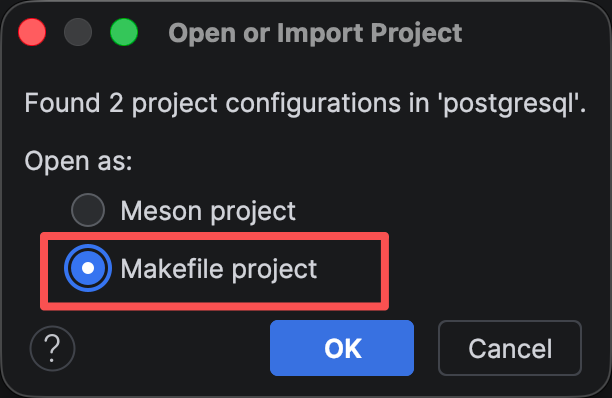
我们刚才是使用 Makefile 编译的,就选 Makefile 就好了。如果你没有弹出来这个选项,那应该是因为你的源码目录中有了 .idea 这个目录,把这个目录删掉,重新开一下就好了。
点这个 Cancel
4 调试
要先保证你的系统中已经安装了 gdb 调试工具(这里也不演示啦)
放开权限
在远程主机上执行如下命令,允许 gdb 不作为父进程时调试其他进程(但这个只临时生效,重启后或许需要重新执行这个命令)
ubuntu@ubuntu:~/lib/postgresql/make-build-debug$ sudo sysctl kernel.yama.ptrace_scope=0
[sudo] password for ubuntu:
kernel.yama.ptrace_scope = 0
启动 pg
# 1. 创建数据所在目录
ubuntu@ubuntu:~/lib/postgresql/make-build-debug$ mkdir -p $HOME/lib/pgdata18-make-dev

# 2. 初始化
ubuntu@ubuntu:~/lib/postgresql/make-build-debug$ $HOME/lib/pgsql18-make-dev/bin/initdb -D "$HOME/lib/pgdata18-make-dev"
The files belonging to this database system will be owned by user "ubuntu".
This user must also own the server process.
。。。。。。。此处省略很多行。。。。。。。
initdb: warning: enabling "trust" authentication for local connections
initdb: hint: You can change this by editing pg_hba.conf or using the option -A, or --auth-local and --auth-host, the next time you run initdb.

Success. You can now start the database server using:

    /home/ubuntu/lib/pgsql18-make-dev/bin/pg_ctl -D /home/ubuntu/lib/pgdata18-make-dev -l logfile start

# 3. 启动
ubuntu@ubuntu:~/lib/postgresql/make-build-debug$ $HOME/lib/pgsql18-make-dev/bin/pg_ctl \
  -D "$HOME/lib/pgdata18-make-dev" \
  -l "$HOME/lib/pgdata18-make-dev/server.log" \
  -o "-p 5434" \
  start
waiting for server to start.... done
server started

# 4. 查看运行状态
ubuntu@ubuntu:~/lib/postgresql/make-build-debug$ $HOME/lib/pgsql18-make-dev/bin/pg_ctl \
  -D "$HOME/lib/pgdata18-make-dev" \
  status
pg_ctl: server is running (PID: 134328)
/home/ubuntu/lib/pgsql18-make-dev/bin/postgres "-D" "/home/ubuntu/lib/pgdata18-make-dev" "-p" "5434"

# 5. 在终端连接 pg
ubuntu@ubuntu:~/lib/postgresql/make-build-debug$ $HOME/lib/pgsql18-make-dev/bin/psql \
  -p 5434 \
  postgres
psql (18.4)
Type "help" for help.

postgres=#

# 6. 确认调试断言
postgres=# SHOW debug_assertions;
 debug_assertions
------------------
 on
(1 row)

# 7. 查看当前对应的 pg 后台进程 pid
# 不要关闭这个终端窗口 后面,我们在终端里执行 SQL 后
# 通过 CLion 进行调试
postgres=# SELECT pg_backend_pid();
 pg_backend_pid
----------------
         135358
(1 row)
attach to process
接着在 CLion 的选项卡中找到 Run 里面的 Attach to Process
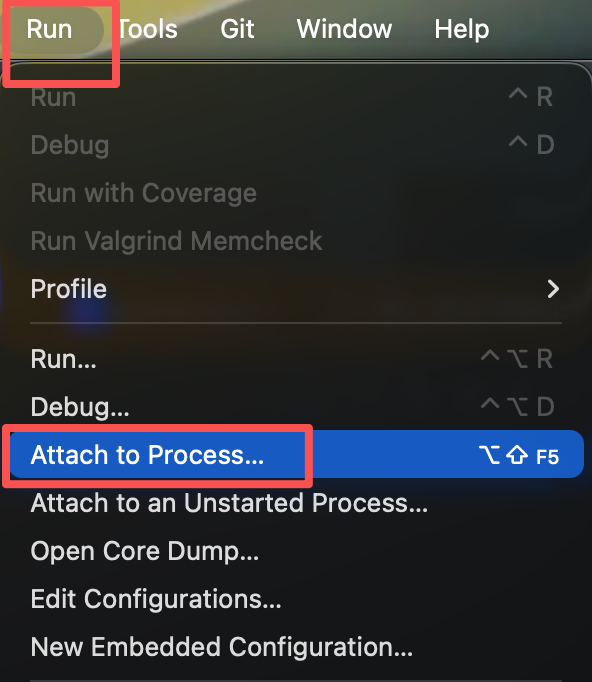
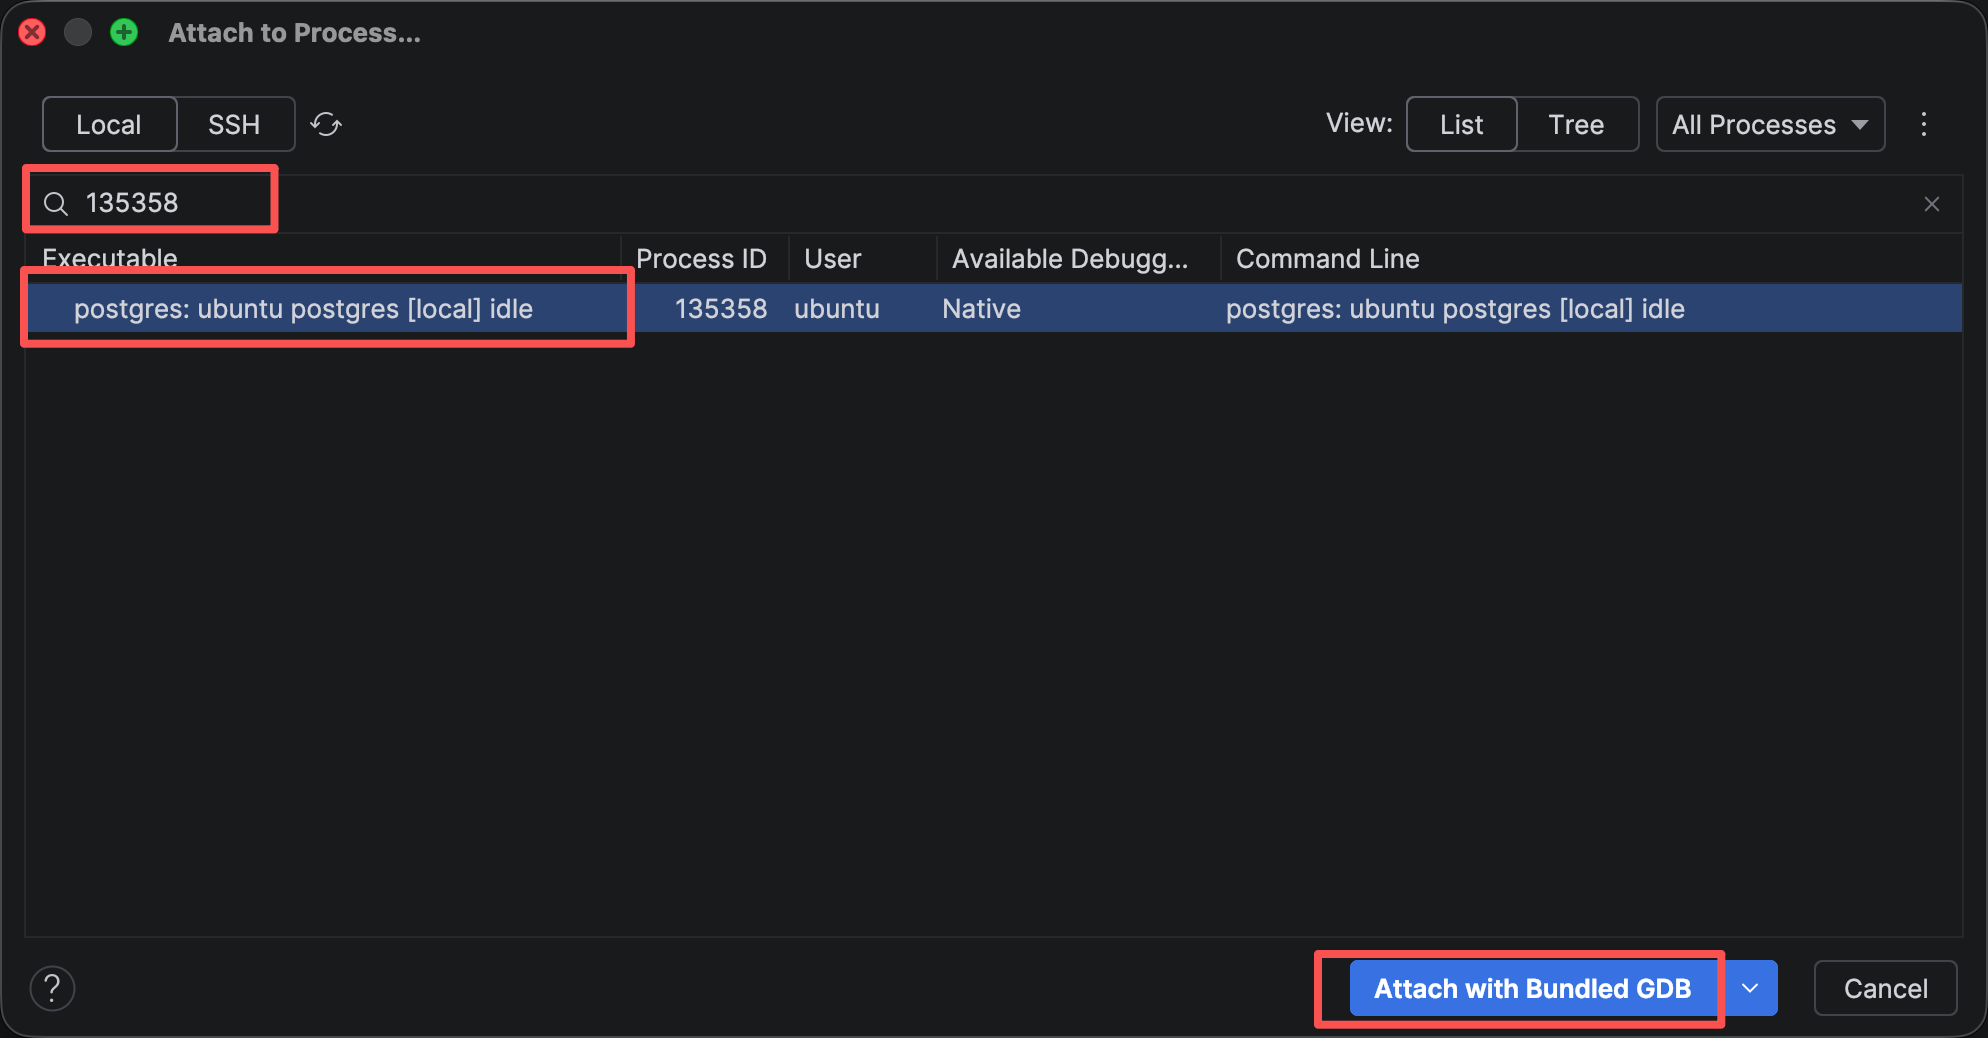
在这里输入我们刚才查到的 pg 的后台进程 pid 随后按图中操作依次点击
打个断点试一下
这时候如果没有什么异常就说明成功了,接着我们找个函数试一下
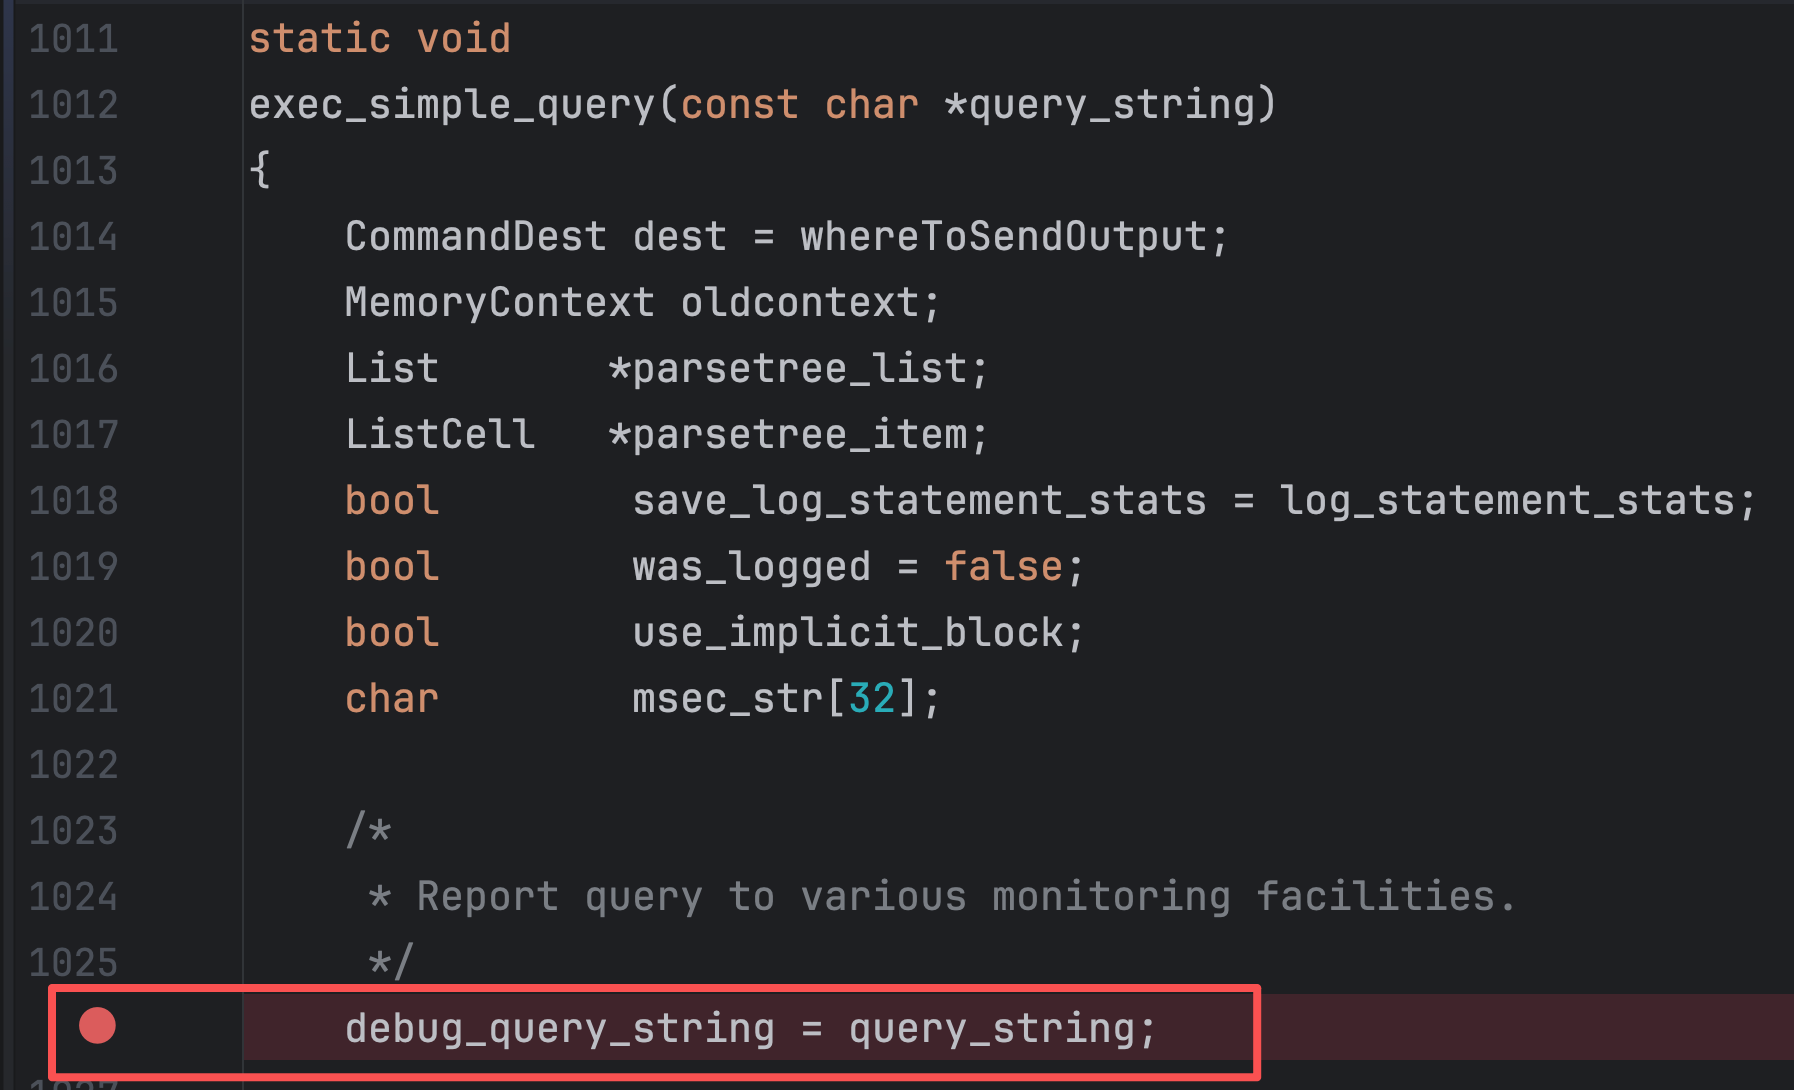
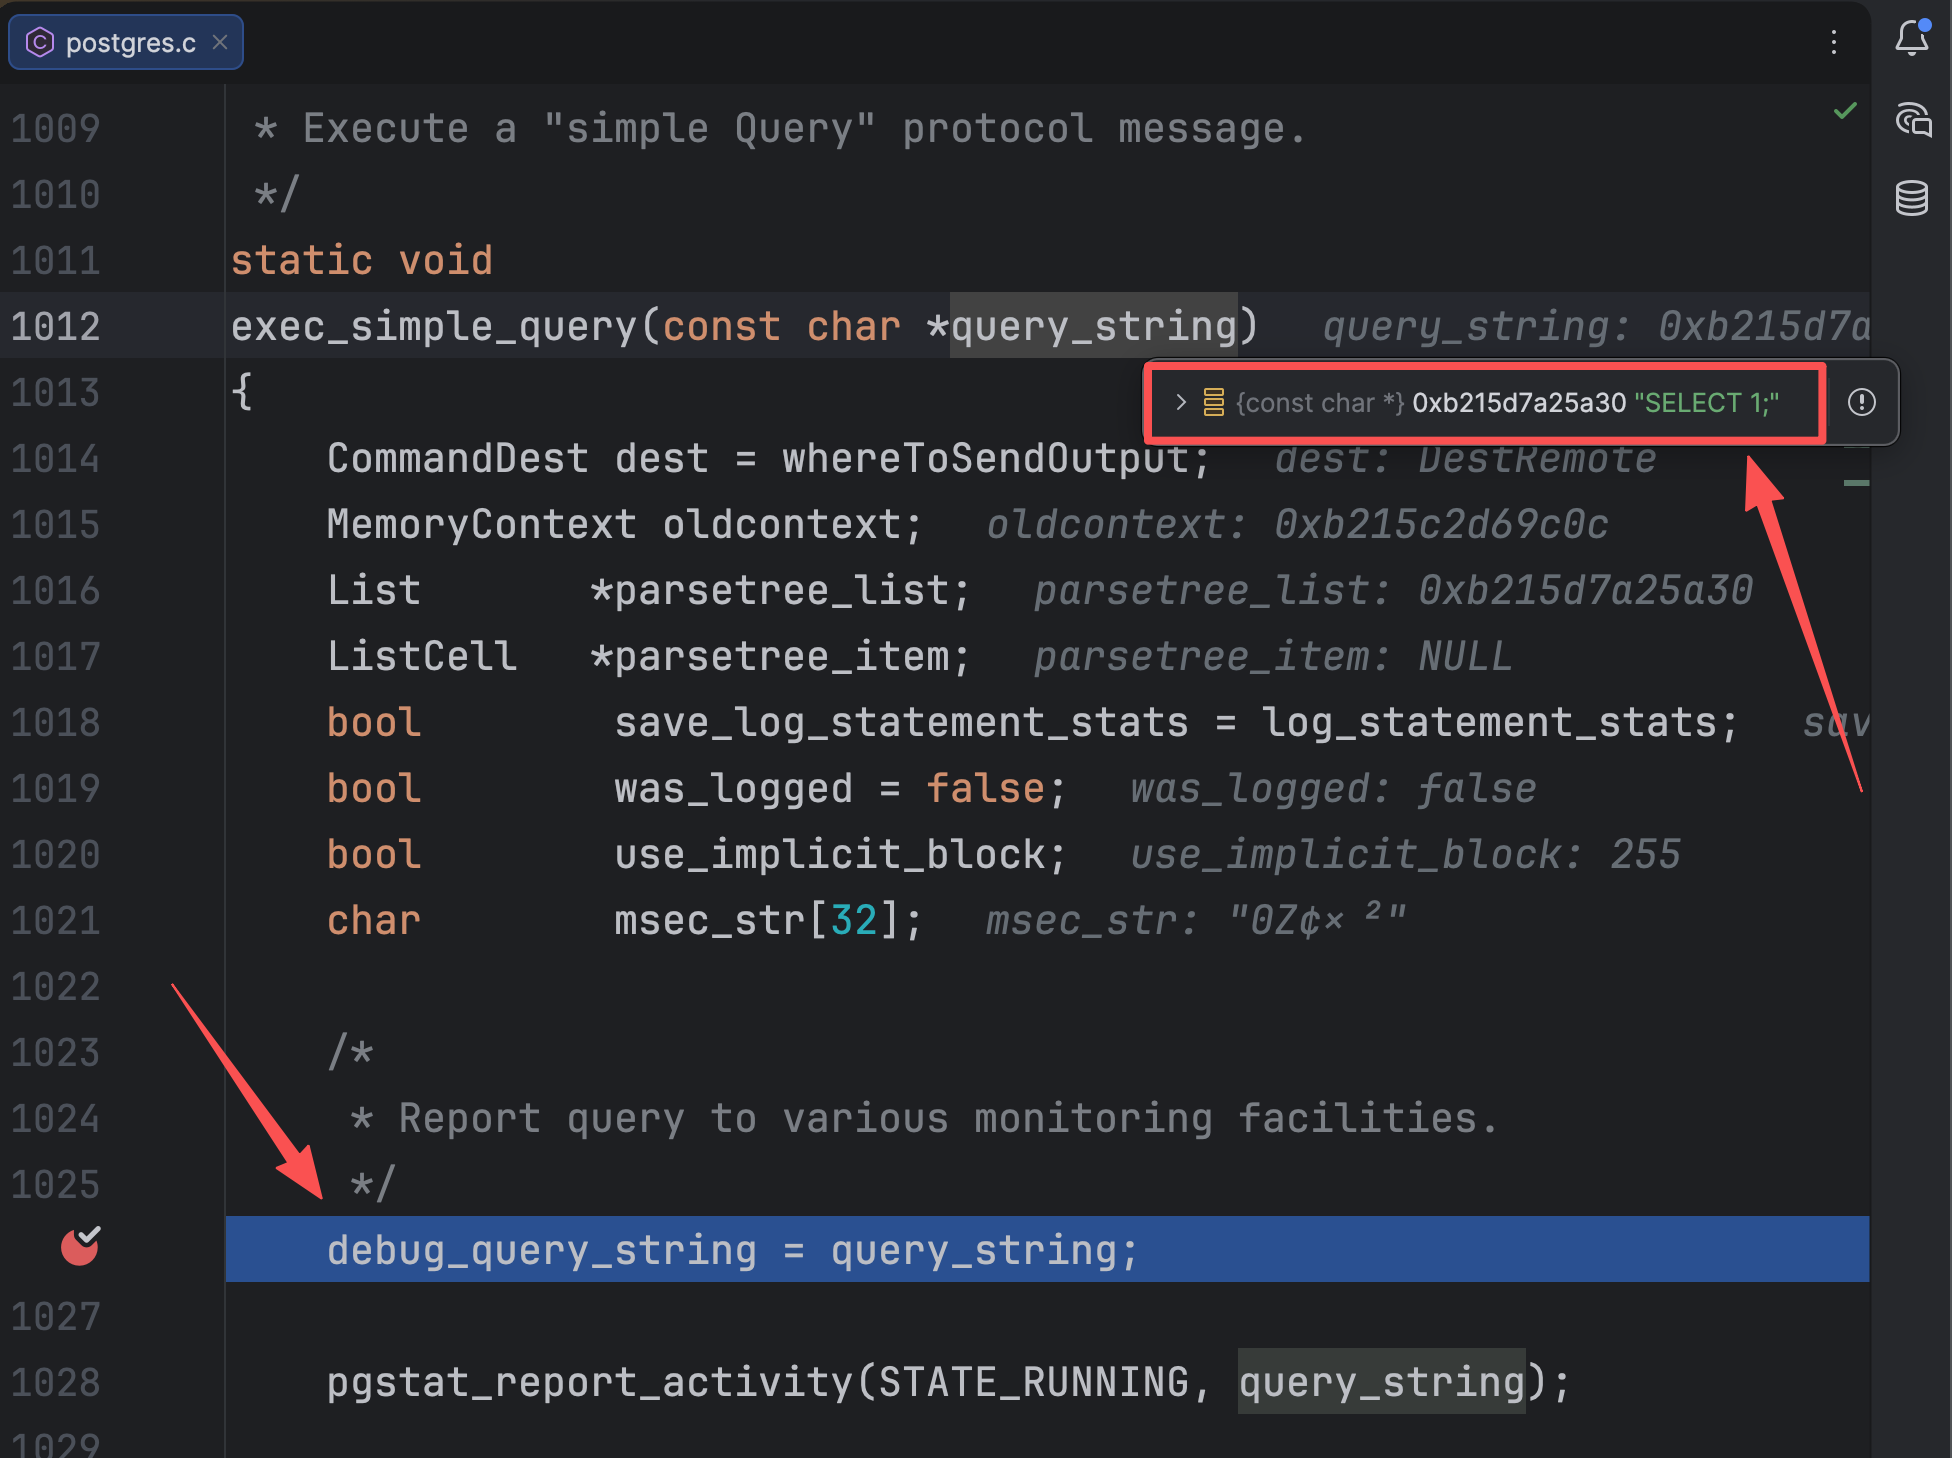
src/backend/tcop/postgres.c 文件中有一个函数是 exec_simple_query ,我在这里打了一个断点
在终端中输入一个简单的查询
比如输入查询 SELECT 1; 然后回车执行它(文本里面还有一些输入和输出是之前的那部分,不用管它)
ubuntu@ubuntu:~/lib/postgresql/make-build-debug$ $HOME/lib/pgsql18-make-dev/bin/psql   -p 5434   postgres
psql (18.4)
Type "help" for help.

postgres=# SHOW debug_assertions;
 debug_assertions
------------------
 on
(1 row)

postgres=# SELECT pg_backend_pid();
 pg_backend_pid
----------------
         135358
(1 row)

postgres=# SELECT 1;
如果一切顺利的话,在你的 IDE 里面可以看到程序运行到这里停止了,在 query_string 里面显示的正是你在终端输入的那个查询语句(并且这时候终端卡到那里不动了)
好啦,到这里就知道如何调试了,后面就可以愉快的学习了 :)